Blog List

Sunday, 14 January 2018

How to Survive a Week Without Running Water

Author
By NICOLE FAIRES

The foundation of every disaster plan is clean water.

outdoor water tap
The average American uses approximately 80 – 100 gallons of water per day, with the largest percentage of that being flushed down the toilet. Our consumption is one of the highest in the world, even when compared to many other first world countries, such as Great Britain, where the average person uses about 40 gallons per day.
Imagine for a moment that you’re like the millions of people who recently found themselves without running water for a week or more. Would you be ready to live without at least 560 gallons of water?

Related:

Where Your Water Goes

On average, your household water consumption is made up of the following uses:
Pie chart
80-100 gallons per day = about 32,000 gallons per year
Along with this, each person has a greater water cost from food, transportation, and other hidden water uses. The bulk of this ‘water footprint’ is from agriculture: livestock grazing, cotton, soybeans, wheat, fodder crops, coffee, barley and corn, for a grand total of 751,777 gallons of water per person, per year.

Factors Affecting Your Water Source

fresh, plentiful blue water
The water we use directly and indirectly every day comes from groundwater, surface water, and rainwater. Each of these sources is becoming less reliable due to climate change, an aging infrastructure, and industry.

Climate Change

According to the Environmental Protection Agency, our changing climate is altering the hydrologic cycle, changing the amount, timing, form, and intensity of precipitation. Other expected changes include the flow of water in watersheds, as well as the quality of aquatic and marine environments.
Where you live will have a big impact on how climate change will impact your water sources. With greater extremes of weather, flooding and drought, a climate that is already somewhere in the middle or colder will have greater stability.
The midwestern and northeastern United States are expected to experience the greatest temperature increases, which means extreme heat waves. Meanwhile, some areas will get much more precipitation, or far less of it. And many places will have stronger cold seasons.
In the northern US, winter is expected to get worse, but there will be less rain in the summer. The Pacific Northwest is supposed to get less precipitation overall and experience colder temperatures. Meanwhile, the South is going to be a lot drier. These changes will not be the same as small weather patterns, but will hit hard and have consequences for agriculture and health.
Clean and accessible groundwater is already becoming very valuable and harder to find. Analysis of U.S. Geological Survey has shown that water levels nationwide in the United States have dropped 64% due to fracking and agriculture, with an average decline of more than 10 feet.
Even more alarming, the declines were consistent even in wet areas, and not dependent on drought. The US Office of the Director of National Intelligence ranked water scarcity as a major threat to national security in 2016.

Aging Infrastructure

To compound the problem, the United States is using a water system nationwide that is rapidly falling apart. Thousands of cities have cast iron pipes that date back to the 1880s and many more cities have a serious lead problem. Maintaining the current water treatment and pipe system for a growing population is already stretching the economy (which we have seen in Flint, Michigan).
Replacing these systems often only happens when pipes burst and cause millions of dollars in damage—like the town of Warren, Michigan, which had to declare a state of emergency after suffering 107 breaks in a month. Despite these issues, it seems that legislation and funding just isn’t happening fast enough.

Being Prepared for a Water Emergency

washing dishes in a stream of tap water
To fully prepare for a water emergency, you’ll need to consider what factors affect the area where you live and what type of emergency you might encounter. You’ll also need to calculate how much water your family uses and how much you’ll need to replace for a short-term emergency situation.
The Federal Emergency Management Agency (FEMA) recommends one gallon per person (or pet) per day for up to two weeks—and that’s just for drinking. If you plan to cook, shower, wash dishes or clothing, you’ll need to replace considerably more than that.
Once you’ve made your calculation, consider the following solutions.

Water Purification

A reliable water purification system is vital when you’re in a situation where water is still plentiful, but it’s not clean, such as when a storm or flooding damages clean water sources or the city declares that the water isn’t safe to drink due to failed infrastructure.
Most jug-style filters don’t remove heavy metals like lead and other contaminants. The Berkey Light Water Purification System reduces the concentration of lead and other heavy metals in the water by over 97%. It also requires no electricity and can filter up to 3,000 gallons.
For compact water filters that are easy to stow, the LifeStraw Family 1.0 can filter up to 4,750 gallons of water, removing viruses, bacteria, and protozoa. The Lifestraw Personal Water Filter easily fits into emergency kits in your home or car. Each one filters 264 gallons of water.
For survival situations where contamination from heavy metals and waterborne illnesses are a threat, consider filtering by distillation. A still uses heat to turn water into steam, leaving contaminants behind. You can get a portable survival model which can even desalinate ocean water.

Storing Municipal Water

Whether or not you have a water filter on hand for drinking water, it’s wise to store water for drinking and other uses.
Unfortunately not all water storage solutions are created equally. Many plastic containers contain harmful chemicals, such as BPA. Plastic or waxed cardboard containers that once contained milk or fruit juice can encourage the growth of harmful bacteria. Glass containers aren’t ideal either, because they’re not earthquake proof and can break during a flood.
WaterBrick emergency water storage containers
Outside of purchasing bottled water, the Centers for Disease Control and Prevention (CDC) recommends using food grade containers manufactured for storing water. Containers like the WaterBrick are made from durable food grade industrial plastic and hold 3.5 gallons each. They can stack compactly into a small area, saving you a ton of space. They are also portable enough to take with you if you ever have to evacuate.
To prepare any plastic container for storage, wash thoroughly before filling, making sure to carefully rinse any soap residue from the inside of the container. Next, sanitize each container by swishing with a quarter cup of bleach mixed into one cup of water. Thoroughly rinse your container with clean water to remove all of the sanitizing solution.
If your municipality treats your tap water with chlorine, go ahead and fill your containers. If you’re storing well water or water that hasn’t been treated, add two drops of liquid household bleach for each gallon of water. Replace your stored water every six months.

Rainwater Storage

Depending on where you live and your roofing materials, rainwater storage is another viable alternative for your emergency water supply. Consider these facts:
  • For every inch of rainfall on 1,000 square feet of roof, you can collect 600 gallons of water.
  • The average home has a roof area of 1,500 square feet.
  • A desert is an area that gets less than 10 inches of water a year.
While it may not supply all of your needs, a 60-gallon rain barrel can supplement your drinking water and provide an extra supply for cooking, laundry, and washing. (If you’re unsure whether your stored rainwater is suitable for drinking, have a test kit on hand to check the water yourself.)
Combined with 16 WaterBricks, a single rain barrel could supply you with over 110 gallons of water without much storage space, enough to get a family through an entire week if combined with the water-saving solutions below. For more information on rainwater storage, read our article: Harvesting Rainwater for Residential Security.

Getting Ready to Use Less Water

In most water emergencies, you’ll need to reduce your water consumption dramatically. Since we’ve seen that most of our water gets flushed down the toilet, a Honeybucket chemical toilet or the Potty Box can take care of 26% of your water consumption.
Another 21% of your water use is in the laundry. Not only will you be wearing clothes a lot longer than you would otherwise, you’ll need to make some hard choices about some eco-friendly items. If you are using cloth diapers, cloth pads, and washable cleaning cloths and rags, you will need to keep a supply of disposable diapers, pads, sterilizing wipes, and paper towels on hand.
Scrubba Wash kit for emergency preparedness
Scrubba™ Wash Kit will allow you to do your laundry with a tiny amount of water and no washing machine. Washing clothes by hand in your bathtub or sink is laborious and doesn’t do the job effectively. The Scrubba cleans clothes in three minutes with very little water.
Keeping clean is another huge challenge without running water, yet hygiene is important in an emergency situation. Use a Simple Shower attachment to create a shower head out of a two liter bottle and keep a large supply of Action Wipes on hand to maintain a normal level of cleanliness. Action Wipes are extra large wet wipes that are safe to use on the whole body, including kids’ bodies, and have a sudsy but quick-drying cleaning solution.

Peace of Mind

Wherever you live, chances are you’ll sleep better at night if you plan ahead and secure enough water for your needs. With a few thoughtful steps, you can ensure that you and your family can weather a water emergency.
Have you been without water for a week? What was the most surprising challenge you experienced?
Pin for later:
pinterest
Author photo
~~
Nicole Faires is an urban farmer and best-selling author of books on sustainable agriculture and food policy. Originally from Montana, she now lives with her family on the West Coast. Find out more at http://deliberatelife.ca or connect with her on LinkedIn. 
For further information log on website :
http://learn.eartheasy.com/2017/09/survive-week-without-running-water/

How to Establish a Clover Lawn

Author
By SHANNON COWAN

Why the humble clover plant is infusing conventional lawns with more than good luck.

rabbit munches clover on green lawn
Ah, the backyard lawn, that controversial patch of greenery adored by some and shunned by others. Restricted to the aristocracy before mechanical mowers made them possible for humbler folk, lawns have become the norm of boulevards and subdivisions alike. But how ‘green’ are they?
On the one hand, lawns require large amounts of water to survive. They are monoculture crops that provide minimal benefits to nature. On the other hand, lawns are ground covers that can prevent the encroachment of unwanted or invasive weeds. They also generate oxygen, provide a lush carpet for children’s barefoot play, and offer a pleasant setting for active summer living—badminton anyone?
However you feel about lawns, one thing is certain: you can make yours more sustainable by considering clover. Before chemical pesticides and synthetic fertilizers, the humble clover plant was a common resident in backyard lawns across the country. Almost everyone’s had some clover growing in it—and some lawns were entirely made of clover. There were good reasons for this.
Not only is clover a leguminous plant, meaning that it can fix nitrogen from the air and release it slowly to the other plants in your lawn, it also stays green longer and needs less water than conventional grasses. Whether you are establishing a new lawn or maintaining an old one, there are great reasons to add clover to your mix.

Benefits of a Clover Lawn

  • Clover is affordable and easy to grow.
  • A nitrogen-fixing plant, clover brings nutrients to your soil and requires no fertilization. When mixed with other grasses, clover can reduce or eliminate the need for regular fertilizing.
  • Clover is drought tolerant and grows despite lack of water once established. This contrasts starkly with traditional lawn grasses, which usually need watering all season long.
  • Full sun or partial shade? Clover is tolerant of many conditions and outcompetes other weeds. Some of the newer micro-clovers are even more tolerant of shade and can grow in high-traffic areas.
  • Clover is versatile. Add to a regular lawn to help invigorate tired turf or plant a full clover lawn on its own for lush, year-round greenery (depending on your geographical location).
  • Wildlife such as bees and deer love clover. If you’d rather not have bees visiting, simply mow your clover before it blooms.
  • Say ‘good-bye’ to burn marks—clover will not turn yellow as quickly as a regular lawn when pets are around.
To be sure if a clover lawn is right for you, contact your local garden center to ask about the success of clover in your region. Most landscape professionals recommend a ratio of 15-20% clover seed to 80-85% drought-tolerant grass seed suitable for your area and location. Since clover is not as hardwearing as grass, a mix ensures your lawn will withstand foot traffic and won’t need regular reseeding. However, new micro-clovers developed in the last few decades offer more resilient varieties that many people are choosing to sow in much higher concentrations—up to 100%. Whatever mix you choose, the balance of clover and grasses will change over time and reach an equilibrium that works well for your soil type and local conditions.

Which Type is Best?

dwarf white clover grows in a healthy green lawn
The two varieties most commonly used in lawns are Dutch (or dwarf) white clover (Trifolium repens) and more recently, micro-clover (Trifolium repens var. Pipolina, for example). Here’s what you need to know about these options:

Dutch white clover:

  • Usually needs reseeding after 2-3 years.
  • Stays green all year round (depending on geographical area).
  • Blooms when mature, providing food for bees.
  • Does best with 4-6 hours of sun daily.
  • Seeds at a rate of about 1lb per 1000 square feet.

Micro-clover:

  • Is fairly shade tolerant, though does best in areas with sun.
  • Can be mowed shorter than white clover.
  • Is tolerant to more foot traffic.
  • Produces about 90% fewer blooms than Dutch white clover.
  • Turns brown in winter due to dormancy period.
  • Seeds at a rate of about 1lb to 300-600 square feet.

Things to Know Before You Start

Clover does best when planted in clay or sandy loam soils with a pH between 6 and 7. To find out your soil’s pH, use a soil test kit or a pH meter. If your soil isn’t in this desirable range, you can adjust the pH using lime (to make your soil more alkaline), or peat moss (to make your soil more acidic).
The best time to plant clover is after the last frost in spring, when rains will help you establish new crop and competing grasses haven’t yet taken hold of available nutrients. Fall planting may also be a possibility if you live in an area with mild autumn weather. Temperatures should remain above 40˚F (4˚C) for the clover to take hold before winter.
As noted above, lawn specialists recommend using both clover and grass seed to establish the healthiest lawn possible. However, don’t spread these different types of seeds together. Since clover seed is so small and dense, and usually clumps together at the bottom of the spreader or seed bag, spreading with grass seed usually results in uneven coverage. Instead, determine your desired ratio of clover to grass and spread separately.

Planting Your Clover Lawn

Vibrant green clover close-up

Overseeding a Clover Lawn:

To add clover to an already established lawn, begin by mowing close to the ground and raking out any thatch that developed over the previous growing season. If your lawn needs aerating, now is the time. Your clover seed will benefit if sown after a thorough aeration. Mix your chosen clover seed with fine sand, sawdust, or soil, and broadcast over desired area. If you are seeding a large expanse, you may want to use a broadcast spreader on the smallest setting. However, keep in mind that many spreaders don’t accommodate seeds as small as clover.
Once planted, water your clover seed every day for two weeks. This will give the seeds adequate moisture for sprouting and help them get a good start in their new location. Be sure to keep deer and other clover-eating animals off the lawn.
The key to giving clover a boost over competing grasses is to cut back on nitrogen-based fertilizers. Since clover fixes its own nitrogen, it will thrive even if this nutrient is lacking (while grasses usually won’t). Phosphorus (P) and potassium (K) are important, however, so choose a fertilizer with a low nitrogen component in favor of P and K.

Planting a New Clover Lawn:

If you are establishing a new lawn, prepare your soil several weeks in advance by removing weeds, stones, and other debris. Rake or till the top layer of soil to loosen the substrate and then water the area to encourage any remaining weeds to sprout. A day or two before planting your lawn, remove any newly sprouted weeds and rake to a smooth, even texture.
Mix your clover seed with sand, sawdust, or fine soil to make spreading easier. Use a broadcast spreader (if you can find one that accommodates clover) for large areas to ensure even distribution. Do not fertilize. Follow with grass seed if using.
Rake the planted area to lightly cover the seeds. They won’t sprout if buried too deeply. Compress with a roller or by walking over the area. Water regularly until established.
reel mower trims lawn of mixed grasses and clover
Before trimming your lawn for the first time, wait until the clover drops its seeds, and then cut fairly close, about 2″ from the ground. This will also favor the clover over the grass, and help the clover plants establish their roots. Leave the clippings on the lawn (they are a valuable mulch). Once the clover begins to thrive, you can reduce the mowing by letting your lawn grow to 3″. You can always overseed with clover if the grass starts taking over.

Other Things To Consider

  • Never use herbicides on a clover lawn. Your clover won’t survive!
  • A new clover lawn won’t usually flower until after its first year. After this time, mow once weekly to control bloom coverage (if desired).
  • If you don’t already have clover growing somewhere in your area, you may need to inoculate the soil to prepare it for the clover seed. You can buy inoculant from your local garden center. Mix into your prepared soil or broadcast with your clover seed at planting time. Some clover seed comes encased in inoculant.
Adding clover to your existing lawn or planting a new lawn with clover in the mix will help reduce the impacts of your little patch of green. With fewer requirements and care, and more time for enjoyment, a clover lawn is a natural choice for your overall sustainability solution.

Pin for later:

How to Establish a clover Lawn
Shannon Cowan
~~
Shannon Cowan is the blog editor at Eartheasy.com. She lives on six acres of land with her husband, daughters, and backyard poultry flock.
~
For further information log on website :
http://learn.eartheasy.com/2017/04/how-to-establish-a-clover-lawn/

Cooking Tips and Recipes for Your EcoZoom Rocket Stove

Author
By STEPHANIE WOOD

Cook delicious meals anywhere with these portable and fuel-efficient stoves.

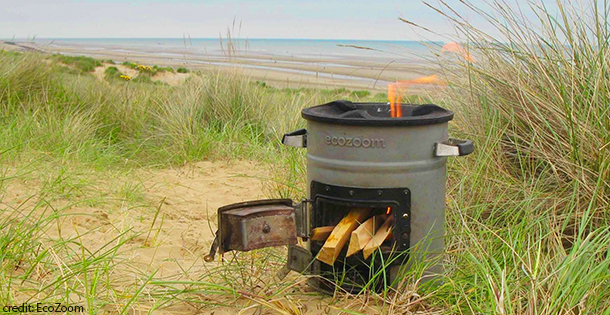
Ecozoom rocket stove on beach

What is a Rocket Stove?

Modern rocket stoves as we know them today developed in the 1980s as fuel-efficient, safe stoves primarily used for outdoor cooking. However, the basic technology behind rocket stoves has been around for centuries. Throughout history, people around the world have used oil lamps, chimneys, and wood-burning stoves with the same convection and combustion cooking methods employed in rocket stoves.
Today’s designs provide a unique alternative to open fires for outdoor cooking. Rocket stoves funnel incoming air through the flames and up through a combustion chamber. This efficient design traps heat and reduces emissions, meaning less fuel is needed to maintain a fire and people inhale less smoke when cooking. The small, contained fire in a rocket stove is also protected from wind, meaning a longer, steadier burn with less flames and charcoal whipped up by unpredictable breezes. As well, for campsites where open fires are not permitted, rocket stoves can be a handy alternative. The easier clean-up, fuel-efficiency, and compactness make rocket stoves extremely useful for camping, backyard cooking, living remotely, and emergency preparedness.
The compact and clean design of rocket stoves has also been put to humanitarian use by organizations such as EcoZoom, a producer of these fuel-efficient stoves. In many countries people still rely on open fires to cook meals, which has resulted in widespread illness and death due to excessive smoke inhalation. EcoZoom has worked with non-government organizations and local governments to provide stoves in countries such as Kenya, Somalia, Mexico and Haiti as a safer, cleaner means of preparing meals for families.
family enjoying food cooked on EcoZoom rocket stove
EcoZoom stoves benefit people by decreasing the amount of fuel they need to collect or purchase, saving them money, and preserving trees. According to EcoZoom, one stove “can save 30 to 40 trees and 12 to 15 tons of carbon dioxide” over its lifetime. Each purchase of an EcoZoom stove also helps support a worldwide initiative to reduce harmful emissions and make cooking an easier and cleaner task for people in both developed and developing nations.

Tips for Cooking with an EcoZoom Rocket Stove

Dura EcoZoom rocket stove alight while cookingThe smallest EcoZoom stove is the Dura Rocket Stove, which can burn wood and solid biomass. The Dura works for all the recipes listed below. There is also the Versa stove, which has a chamber for burning charcoal, allowing for more controlled heating. The Plancha stove is a larger model with two burners.
When using a wood-burning stove, make sure you have dry sticks and kindling to begin the fire. Check if your sticks are green on the inside – if so, they will smoke lots and burn little. The EcoZoom Rocket Stove is extremely efficient, so only a few sticks are needed, and they do not need to be big in diameter. EcoZoom recommends only using three sticks at a time. Start with less for more efficient cooking, especially if simmering – you may be surprised at how quickly the flames gain height!
Cast iron cookware is best for evenly conducting heat, especially over a fire. Cast iron cookware will ensure your food cooks more consistently, and is also extremely durable. EcoZoom sells a cast iron Dutch oven, frying pan, and grill pan that will perfectly fit your EcoZoom Rocket Stove.

Simple and Delicious Recipes for your Rocket Stove

Whether you’re camping or in your backyard, the rocket stove makes for easy and enjoyable cooking. The recipes below use overlapping ingredients for easy packing and preparation, and are single-pot as often as possible. Preparing some of your food ahead of time – for example, marinating chicken, chopping vegetables, dividing spices, and sorting everything into jars and containers – can save you a lot of time when you’re hungry for a hot meal.

Quick Berry Pancakes

Dry Ingredients:
1 cup flour
1 tsp baking powder
1 tsp salt
Fresh Ingredients:
1 large egg
1 cup milk
seasonal berries
optional sweetener (1 tsp cinnamon or vanilla)
Instructions:
  1. Prepare dry ingredients in a jar at home in advance, if camping. Make sure there is room to add the rest of the ingredients later.
  2. Add the egg, milk, and optional vanilla. Shake the jar until the batter is smooth. Add more milk if necessary.
  3. Pour batter onto a greased cast iron frying pan over your rocket stove, or use a ¼ cup to scoop. Cook until the bottom is golden brown, then flip to the other side.
  4. Serve on a plate and sprinkle with seasonal berries. Other toppings can include chopped nuts, granola, chocolate chips, honey, nut butter, and maple syrup.
Alternative: You can also add the berries directly to the mix and by shaking them up in the jar with your other ingredients.

Avocado Smash Breakfast Toast

Smashed avocadoes topped with over-easy eggs on toast
Ingredients:
1 tbsp olive oil
1 full avocado
2 large eggs
2 pieces of whole wheat toast (or an English muffin)
salt and pepper
Instructions:
  1. Cut your avocado in half, remove the pit. Scoop out the flesh and smash with a fork on a cutting board.
  2. Heat up your rocket stove. While your frying pan is dry, quickly toast your two pieces of bread to your desired crispness.
  3. Remove the toast and add oil to your frying pan. Crack the two eggs onto the pan. This recipe recommends doing your eggs over easy, but other methods, such as scrambled and over hard, will also be fine. Try to keep the flame low especially if you’re doing your eggs over easy.
  4. To make over easy eggs, crack the eggs into the pan and leave the yolk whole. Once the bottom is cooked and the edges begin to brown, carefully flip each egg, keeping the yolk intact. Only cook this side lightly to ensure the yolk stays runny.
  5. While your eggs cook, spread your avocado smash onto your toast. Sprinkle with salt and pepper.
  6. Transfer your eggs on top of your avocado toast. Add salsa, Siracha sauce, bacon, cheese, or any other of your favourite breakfast food.
Gluten-free Alternative: Cut the avocado in half and take out the pit. Crack one egg into a bowl. Carefully spoon out the yolk and put into the hollow in one avocado half. Top the yolk with the egg white. Crack a second egg and do the same to the other half. Bake the two halves in a Dutch oven until the tops are cooked. Add toppings to your stuffed avocados.
If you don’t have a Dutch oven, hard boil one egg over your rocket stove. Cut the egg in half to fit into each hollow part of the avocado. Add toppings.

Baked Brussels Sprouts with Spicy Nut Sauce

Ingredients:
1 pound of Brussels sprouts, halved
1 tbsp olive oil
salt and pepper
1 tbsp maple syrup
1 tbsp Siracha sauce
1 tbsp peanut or almond butter
Instructions:
  1. Toss the Brussels sprout halves in the olive oil and salt and pepper. Lightly grease the bottom of a cast iron Dutch oven.
  2. Spread Brussels sprouts across the bottom of the oven and cover. Let bake until soft and lightly browning.
  3. Meanwhile, mix Siracha, maple syrup and nut butter in a small bowl. Add ½ tablespoon of a nut-sourced milk, if available, to thin the sauce. If not, water will do fine. This sauce can also be prepared at home ahead of time.
  4. Transfer brussels sprouts into a bowl and toss with the spicy nut sauce. Add your favourite toppings. Recommendations: shaved parmesan, dried cranberries, and spliced almonds or other chopped nuts.
Alternative: If you don’t have a Dutch oven, Brussels sprouts can also be roasted on a frying pan with olive oil until soft.

Salmon and Berry Salad

Ingredients:
1 large salmon fillet
1/3 cup blueberries
1/3 cup cut strawberries
¼ cup pecan pieces
¼ cup shaved parmesan
½ package spinach
2 sprigs of rosemary
1 tbsp olive oil
1 lemon, ½ sliced
salt and pepper
Instructions:
  1. Organize your ingredients at home into easy containers so you can quickly throw most of the salad together.
  2. Over a low flame, pour oil onto a cast iron frying pan. Squeeze lemon over salmon fillet and top with rosemary, salt, and pepper. Place the salmon on the frying pan with your slices of lemon. Try to keep the heat lower with less fuel, to ensure the salmon cooks properly all the way through. If you have a Dutch oven, you can also bake your salmon.
  3. Meanwhile, combine spinach and berries. Squeeze other half of lemon over top and toss. You can also add some olive oil if you find it too dry. Top with parmesan and pecans.
  4. Once salmon is flaky, place on top of the rest of the salad with roasted lemon.

Baked Cinnamon Apples

Sliced red apples caramelizing in a Dutch oven
Ingredients:
1 tablespoon olive oil
2 large apples (or pears, if preferred)
1 tablespoon melted butter
½ tablespoon cinnamon
½ tablespoon brown sugar
Pinch of nutmeg
Instructions:
  1. Combine spices and sugar at home and secure in a container.
  2. Melt butter in frying pan over your rocket stove.
  3. Cut your apples in half and cut out the core. Spread out the melted butter over the two halves and top with the sugar mixture. Lightly grease the bottom of a cast-iron Dutch oven. Insert the apples and cover. Bake the apples until they are soft. You can also add chocolate pieces or chopped nuts, or use them as an alternative to sugar.
  4. If you do not have a Dutch oven, cut your apples into thin slices. Pour oil onto a frying pan. Add the apple slices and sugar and spices mixture. Coat the slices evenly. Pan fry the apples slices until soft and brown. Add any other toppings.

Bonus Quick Treats

Popcorn

Pour two tablespoons of olive oil into your Dutch oven. Add few popping corn kernels to start. Once the oven is hot enough and they begin popping, add another 1/3 cup of kernels and shake or stir so all the kernels are coated in oil. As soon as the popping stops, pour your popcorn into a bowl. Melt some butter and drizzle over top.

Apple Cider or Mulled Wine

Pour apple juice in a saucepan with apple slices, one teaspoon of cinnamon, and a half a teaspoon each of nutmeg and cloves. Alternatively, combine red wine with the spices, as well as a few shots of sherry and some orange and lemon slices for a simple mulled wine.

S’more Pie

Add a bit of oil or butter to your Dutch oven. Crumble graham crackers in your hands and create at least a one inch layer. Next, add a layer of dark chocolate broken into pieces. Top with marshmallows and cover. Cook until the top of the marshmallows begins to brown. A fun twist on a camping classic! Feel free to add nuts or dried fruit in the middle with the chocolate.

Pan Fried Pizza

Super simple and easy to prepare at home ahead of time: start with a whole grain pita and add your favourite toppings. Keep in a sealed container in your cooler. To prevent it getting soggy, it’s best to have early on in your camping trip. Simply throw the pizza into a frying pan over your rocket stove until the bread gets a little crispy and the cheese melts. Go for something a little different by doing pesto instead of tomato sauce, and feta instead of cheddar.

Other Ideas

Use your frying pan to make a quick stir-fry or to roast some skewers. Potatoes, peppers, onions, chicken, shrimp – the options are endless. Dutch ovens are also perfect for homemade soups, chilis, and stews. For ambitious cooks, they are ideal for making bread and pastries. You could even bake pizza dough from scratch.
With a rocket stove and a few quality appliances, you don’t have to feel limited while cooking in the outdoors. So, make these recipes your own, pack up your rocket stove, head outdoors and start cooking!
Pin for later:
Cooking Tips and Recipes for Your EcoZoom Rocket Stove
Author photo
~~
Stephanie Wood is a freelance writer from North Vancouver, BC, with a special interest in environmental journalism. She enjoys hiking trails, finding thrift and antique treasures, and traveling abroad.
~
For further information log on website :
http://learn.eartheasy.com/2017/05/cooking-tips-and-recipes-for-your-ecozoom-rocket-stove/

7 Life Lessons Your Garden Can Teach You

Author
By NICOLE FAIRES

Dig a little deeper and you’ll find unexpected insight right in your garden.

Water droplet on leaf
I say, if your knees aren’t green by the end of the day, you ought to seriously re-examine your life.
– Bill Watterson, Calvin & Hobbes
A garden delights every sense – the bees humming amongst the flowers, the soft dirt between our fingers, the bright colors of ripening fruits amidst the greens, the taste of a freshly picked tomato. But true garden lovers know that the benefits of gardening aren’t just physical. As the years pass season to season, gardens teach us things about life that change who we are.

1. Learning to look at things from a different perspective can save you a lot of heartache

My green thumb came only as a result of the mistakes I made while learning to see things from the plant’s point of view.
– H. Fred Dale
There are gardeners who battle against the elements, fighting to put a specific plant in a specific place, only to find that the same pests return year after year to destroy their best-laid plans. ‘Why don’t the chemicals work?’ they cry, and, ‘What am I doing wrong?’ When you’re beating your head against the wall because the same old thing isn’t working any more, maybe it’s time to reevaluate and try something new. Change is good, especially being able to see something with new eyes.
Lady bug on moss

2. Optimism is important

Gardening is a matter of your enthusiasm holding you up until your back gets used to it.
– Author Unknown
Seed catalogs arrive when snow is still on the ground in most places, and garden planning is really just an act of imagination. The failures of the previous year and the hard knots in your lower back have faded away just long enough to dream of an even better garden this year. Trusting that the future holds the possibility of better things, new growth, and sunshine (as well as much-needed rain) is the first step to making good things happen.

3. The most beautiful things in life are sandwiched between a rock and a hard place

In gardens, beauty is a by-product. The main business is sex and death.
– Sam Llewelyn
One of everyone’s least favorite gardening jobs is thinning seedlings (or at least mine is). I feel guilty every time I pinch away the tiny little plant which has just sprung from the soil. Plants die, either through their natural cycle, or because something killed them. They rely on the nitty-gritty business of bees and wind to produce seeds, and they struggle through the soil around rocks and tiny creatures just waiting to devour them. The garden is a battleground of survival, but through it all is this miraculous and beautiful life, which is not only thriving, it’s exuberant in its existence. Life needs that struggle and the reality of sex and death to create the beauty within it.Terra cotta pots

4. It’s okay to be alone sometimes

It is good to be alone in a garden at dawn or dark so that all its shy presences may haunt you and possess you in a reverie of suspended thought.
– James Douglas, Down Shoe Lane
There are a few people who revel in aloneness, but there are many more of us who find it insufferable to be alone, in the quiet, with our own thoughts. The magic of the garden is that it somehow always feels okay to be out amidst the plants, sweating and pulling weeds, feeling the satisfaction and pride of a well-tended garden, absolutely alone. If you must choose between the meditation of sitting in a quiet room and the meditation of gardening, it’s far easier to empty your mind in the physical exertion of a garden than it is in the dark, sitting on the floor. And then, in the quiet of your mind surrounded by the noisy chaos of wind, bees, birds and crawly things, you will find that being alone is often good.

5. Every good thing requires hard work

Our England is a garden, and such gardens are not made
by singing, “Oh, how beautiful!” and sitting in the shade…
– Rudyard Kipling, ‘The Glory of the Garden’
First-time gardeners are surprised by the time it takes to make a good garden. There are anthropologists who argue that one of humanity’s biggest mistakes was to switch from hunter-gatherers to farmers, because it took up so much more of our day and our energy. We chose the life of agriculturalists because it produced a surplus – a way of creating some insurance for the future. Hard work is the secret ingredient for every good thing in life, especially really hard work. The harder you work at something, the better it will be.

6. Failure is the necessary stepping stone to success

A garden is always a series of losses set against a few triumphs, like life itself.
– May Sarton
Every year in the garden is a circle of successes, and even more failures. Which variety of lettuce will do better in the heat? Why did I have so many cutworms? Why didn’t my carrots sprout? It’s an experiment that takes place over and over again to find the right formula, and often there isn’t one. What worked one year might not work the next.
A ‘successful’ garden is a misnomer: there is no such thing as 100% success in gardening. When you are dealing with nature, there are no guarantees. There is also not a single successful person who does not have a long story to tell about the extreme failures they experienced on the road to that success. If you were only able to take one skill to a deserted island, being able to fail well and learn from failure will be the secret to finding your way out.
Wildflowers

7. The unexpected can often be beautiful and magnificent

You can plan ahead but the unexpected will happen and it’s not always a bad thing. Many things grow in the garden that were never sown there.
– Thomas Fuller, Gnomologia
Just like our gardens, life is short, fraught with the unexpected, filled with failure and adversity, and never seems to go as we planned. It’s also magnificent in its beauty as we experience love and laughter, adventures, and the small joys that can fill us with sublime happiness.
Almost none of the happiest moments in life are planned – instead, it’s the spontaneity of life that is the most delightful part. Let us revel in the little things and find joy in the dirt!
Pin for later:7 Life Lessons your Garden can Teach You
Author photo
~~
Nicole Faires is an urban farmer and best-selling author of books on sustainable agriculture and food policy. Originally from Montana, she now lives with her family on the West Coast. Find out more at http://deliberatelife.ca or connect with her on LinkedIn. 
For further information log on website :
http://learn.eartheasy.com/2017/06/7-life-lessons-garden-can-teach/

Advantages and Disadvantages of Fasting for Runners

Author BY   ANDREA CESPEDES  Food is fuel, especially for serious runners who need a lot of energy. It may seem counterintuiti...